How To Replace A Drop-Down Attic Ladder? [A Step-By-Step Guide]
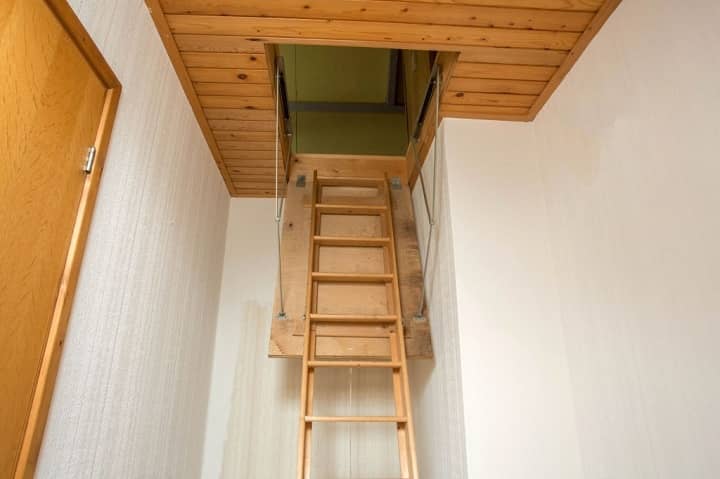
There are no better places in the house than attic storage to stock the extra goods and other household items. A drop-down ladder helps to ease the job while storing the items, as it can be easily folded and adjusted back to the ceiling.
As time goes by, the bolts, joints, bungee cords, and the materials of the ladder wear out and need to be replaced to avoid injuries and accidents.
In this article, I will provide you with a step-by-step guide and the tools that are required to replace a drop-down ladder on your own.
5 Simple Steps To Replace Your Drop-Down Attic Ladder:
Before you go further into the procedure, make sure to gather all the tools. Here are the 5 simple steps to replace your drop-down attic ladder.
Step 1- Measure The Ladder Opening Accurately:
Replacing your attic ladder requires a new ladder and before ordering or buying a new replacement, it is essential for you to measure the attic opening and buy according to the size of your current ladder or stairs.
A standard ladder opening size is 25” by 54”. But, it may vary from store to store according to the shape of the ladder. Use a measurement tape and write all the accurate figures not only because of the ladder opening, but you need the measurement to fit the support boards and other necessary tools to replace your ladder.
Step 2- Remove The Screws And Bungee Coats:
In order to replace your attic ladder, it is very necessary for you to patiently remove all the screws from the plywoods and the wood frames of your current ladder.
Make sure to not stand on the ladder, otherwise, you might fall off the stairs. Use a resting tool, or ask someone to support you from the back while removing the screws and bungee coats from your ladder. Apply pressure to bend the hinges of the ladder to get the spring off.
Be patient as it will take a bit of effort to remove the hinges from the corner of your ladder. Cut off the hinges with a saw and cut off all the screws using a plier or a saw.
Step 3- Carefully Remove The Old Attic Ladder:
Once you have successfully removed all the hinges and the screws from the ladder, carefully remove the attic stairs with the help of your partner or someone strong enough to assist you. Make sure to keep your partner on top of the storage space to avoid any kinds of accidents.
The ladders are heavy and were used for a long time. So taking precautions is necessary. Someone needs to hold the ladder with a tight grip at the top. If you feel your partner is not strong enough, change positions to pull the ladder down.
Step 4- Install The New-Drop Down Attic Ladder:
This is a very crucial step as you need to fit in the ladder accurately from the top. Since you are doing all the work, it is recommended for you to climb up to the storage space and ask your helping buddy to push the ladder up. As a result, you can fasten it or drill it from above.
While climbing up the step ladder, pull up the ladder carefully. Ask your helping hand to push it slow. Once you are up in the space, drop the ladder into the attic opening and use support boards to place them right. It is time for you to screw the sides of the ladder and make sure no one is standing exactly below the ladder.
After fastening it with a power drill using ¼ “ or ⅛ “ drill bits, gently climb down and see if the height of the ladder matches with your ceiling. If not, then you need to cut off the extra part to properly adjust the ladder.
Step 5- Cut Off The Extra Layer Of Your Ladder:
The next step is to cut the height and the length of your ladder to match the height of your ceiling. Some of the manufacturers cut the bottom part of the stringer much longer so that you can do that. Take the ladder and unfold it but not the entirety of it.
Take your measure tape and measure it accurately by gently leaning against the ladder down to the floor. Make sure if you do not hold the tape in the right orientation. Otherwise, the whole measurement of the ladder will go wrong. Use a stick to measure the extra part you want to cut off.
You can use a scrap piece of wood to mark the extra layers of your ladder. Use the stick to mark the sides and the bottom of the layer you want to cut off accurately. Now fold the ladder and close it down. Use the pull rope to see if your attic ladder is working fine.
Some Related Questions:
What Are The Things Required To Replace A Drop-Down Attic Ladder?
Things that are required to replace drop-down attic ladders are:
- Electric Drillers,
- Drill Bits ( ¼”, ⅛”),
- Pliers,
- Measurement Tape,
- Saw,
- Hammer,
- Step-Ladder.
What Are The Basic Measurements Of Setting Up An Attic Ladder?
It is very important to know all the dimensions and measurements of your ladder before you buy it. You need to make sure you have enough spaces to set up and replace your ladder. Here are the measurements:
| Dimensions | Measurements |
| Attic Ladder Opening | 22.5”x54” |
| Ceiling Height | 7 to 9 Ft |
| Space Needed To Land The Ladder | 30”x40” |
| Space Needed To Swing The Ladder | 28”x42” |
How Much Does It Cost To Replace A Drop-Down Attic Ladder?
It takes around $300-$700 to replace a drop-down attic ladder depending on the material of the ladder. The cost of the tools and kits is also included in this range. Hiring a professional will cost you more because of the labor charges.
When Should You Replace Your Drop-Down Attic Ladder?
Replacing your drop-down attic ladder depends on the material of the ladder. It is safe to replace and install a new drop-down attic ladder after every 4 to 5 years. However, steel attic ladders last more than 7 to 10 years compared to wooden ladders.
Conclusion:
There is no doubt that you need some creativity and skills to get this job done accurately and successfully. For any other queries, write to us in the comments section. Read my other articles to know more about the installation of an attic ladder.